There had been that over heat incident of last summer with the Brothers Kincaid. I figured the issue was the new screen raw water strainer. That same strainer also began the chain of events that resulted in the "Hot Flash". It has so restricted raw water flow that it ultimately burnt the electric raw water pump out. The pump would have to be replaced. With the pump down, I knew that it was likely a good time to give the entire cooling system the once over.
I wished I could tell you the simple replacement of the Flo Jet Raw Water Pump was easy, but with all things Corleto, she teaches me new and exciting combinations of profanity. In the end, I realized that I needed either a third hand, or a second elbow, but settled for a new power tool, a small Impact Driver. The new wonder tool got the job done and I was able to install a new working raw water pump.
However, there is more that just a raw water pump in the cooling system. There is a mystical metal unit located at the back of the engine that is an after market modification, the Heat Exchanger. Removing anything that seems to be in good working order goes against my nature, but I needed to be 100% sure that it was working to its maximum potential. I took pics with my iPhone and labeled the hoses. This is so when I would reconnect, it would be as I had found it. Everything came out surprisingly easy, which to my suspicious and sometimes active imagination, made me a bit nervous.
 |
| The Heat Exchanger |
Getting the copper /brass heat exchanger in the shop was a good thing. It was covered in oxide and it seemed to rattle with bits inside the chamber. I carefully took apart the bottom cover bolt to expose a series of tubes, bits of sand, sea shell bits and a rather massive zinc deposit right around the opening for the pencil zinc bolt. I looked at it and realized that was the reason I could not get a pencil zinc into place without severe modifications to the new zinc.
I still had to remove all of the zinc build up, so I got the Dremel and removed the build up with the help of one of the Flight Engineers at Talon, Norm. It took a bit of patience, but between the two of us we got rid all of the old material and re tapped the threads to the bolt head.
 |
| Norm- Flight Engineer at Talon, re tapping the zinc bolt head |
With the unit in pieces I figured I should also clean up the outside and give it a new paint job. First cleaning off all of the oxide and loose flakes of old paint with the Dremel tool. Then I sprayed a coat of primer and later two coats of paint. You would think I had a brand new part when I was finished.
I was able to insert a full pencil zinc into the unit now that all of the old build up had been removed.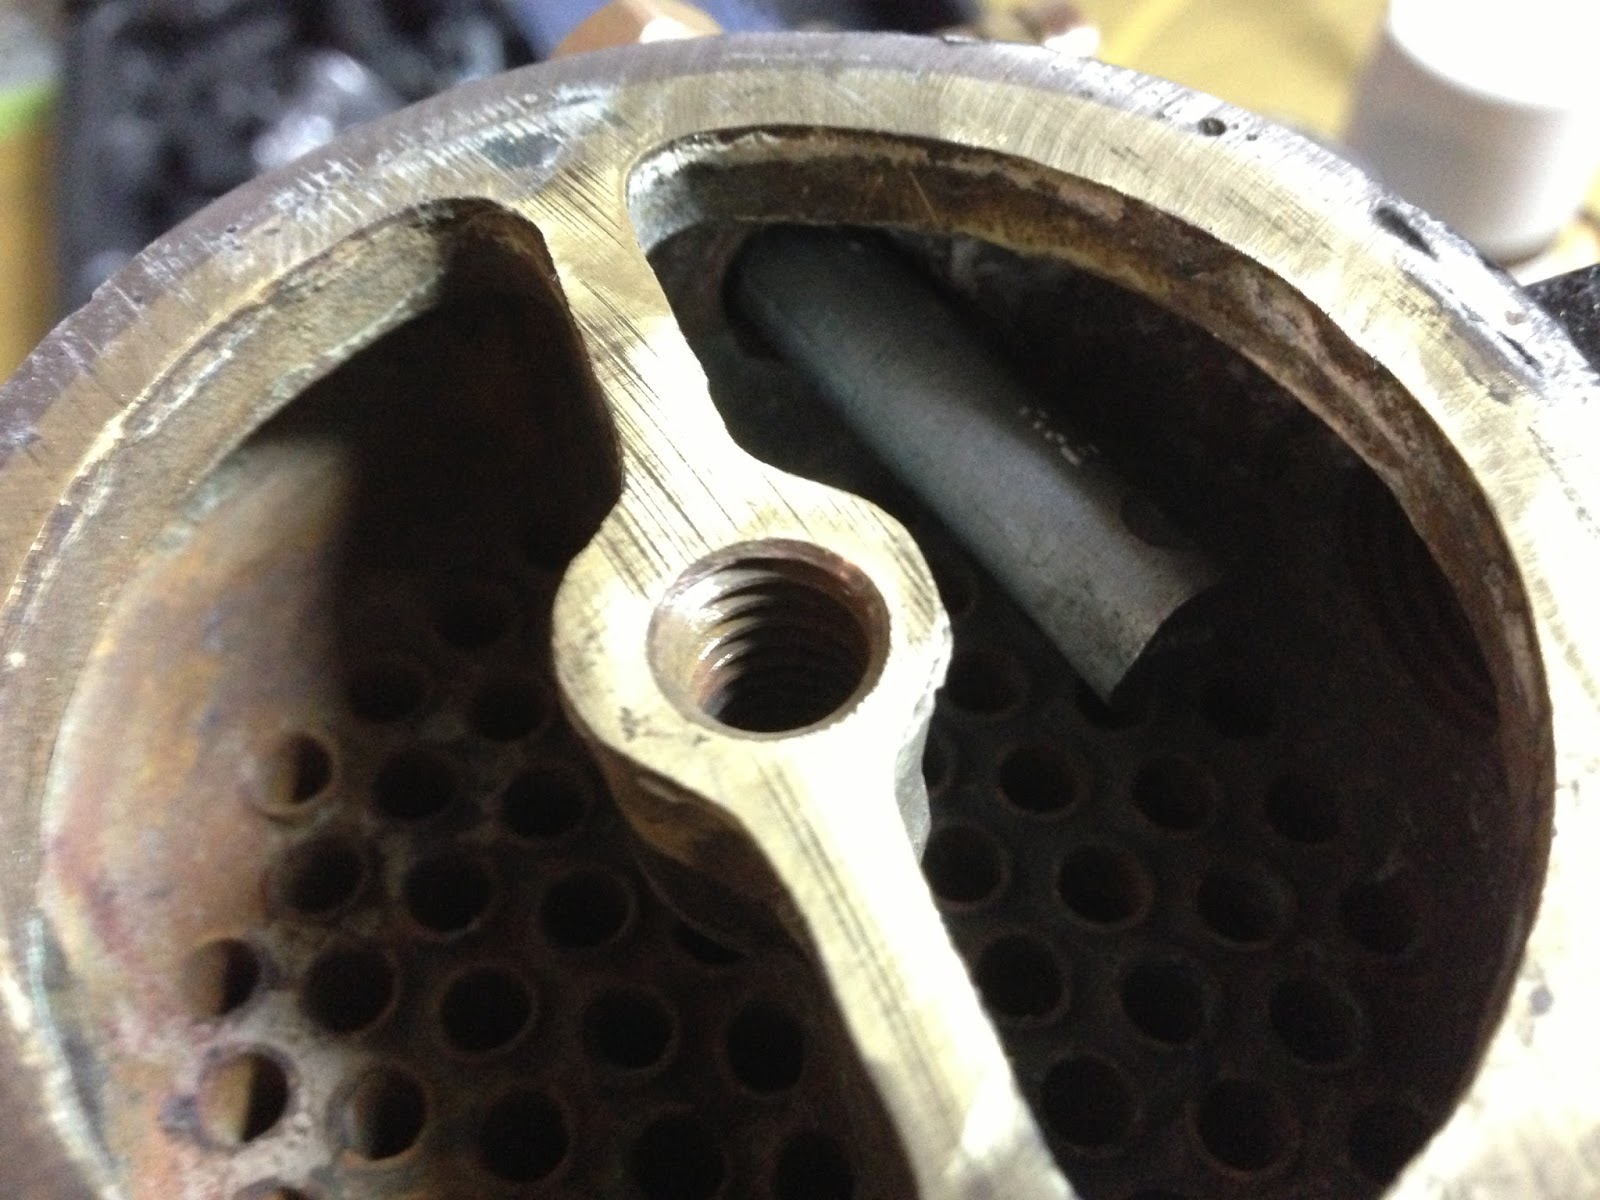 |
| In the upper right you can see the full pencil zinc installed |
The only thing left to do now, was to reinstall the exchanger to the cooling system of Corleto's engine. Before filling the unit with coolant, I thought I should check the impeller. Turns out it was on its last legs, so I installed a new one and began to fill the heat exchanger with a 50/50 mix of water and antifreeze coolant.
 |
| New impeller- Check! |
 |
| All painted and hoses re attached. |
The test would come when I fired up the engine and ran it under a load for 30-40 minutes and watched the TEMP gauge. Everything indicated normal.
 |
| Nominal TEMP |
I breathed a huge sigh of relief, and enjoyed my victory.
No comments:
Post a Comment